June Edition is Here!

Hurray it's June!  Summer is finally here and the warm weather is settling in.  Gardens and Farmers Markets are beginning to rock providing us a plethora of inspiring things to cook and create with.  I hope you're as excited as I am about this season, and will run straight to the kitchen to try the recipes for this month. 
There are videos to watch demonstrating the Lemon & Black Pepper Shortcake (oh my is it good!), Mustard & Herb Roasted Pork Tenderloin, and Mark's Favorite Tenderloin Sandwich.  Roast the tenderloin and have enough to make three recipes!  Now that's what I call easy summer (or anytime) living.
I've got to go out and gather some herbs so I can get into the kitchen, working on issues for the coming months.  Before I go, though, I want to give you my heart-felt thanks for joining me on this cooking adventure.  You are my biggest inspiration and I appreciate you more than words can express.  Thank you!
Blessings,

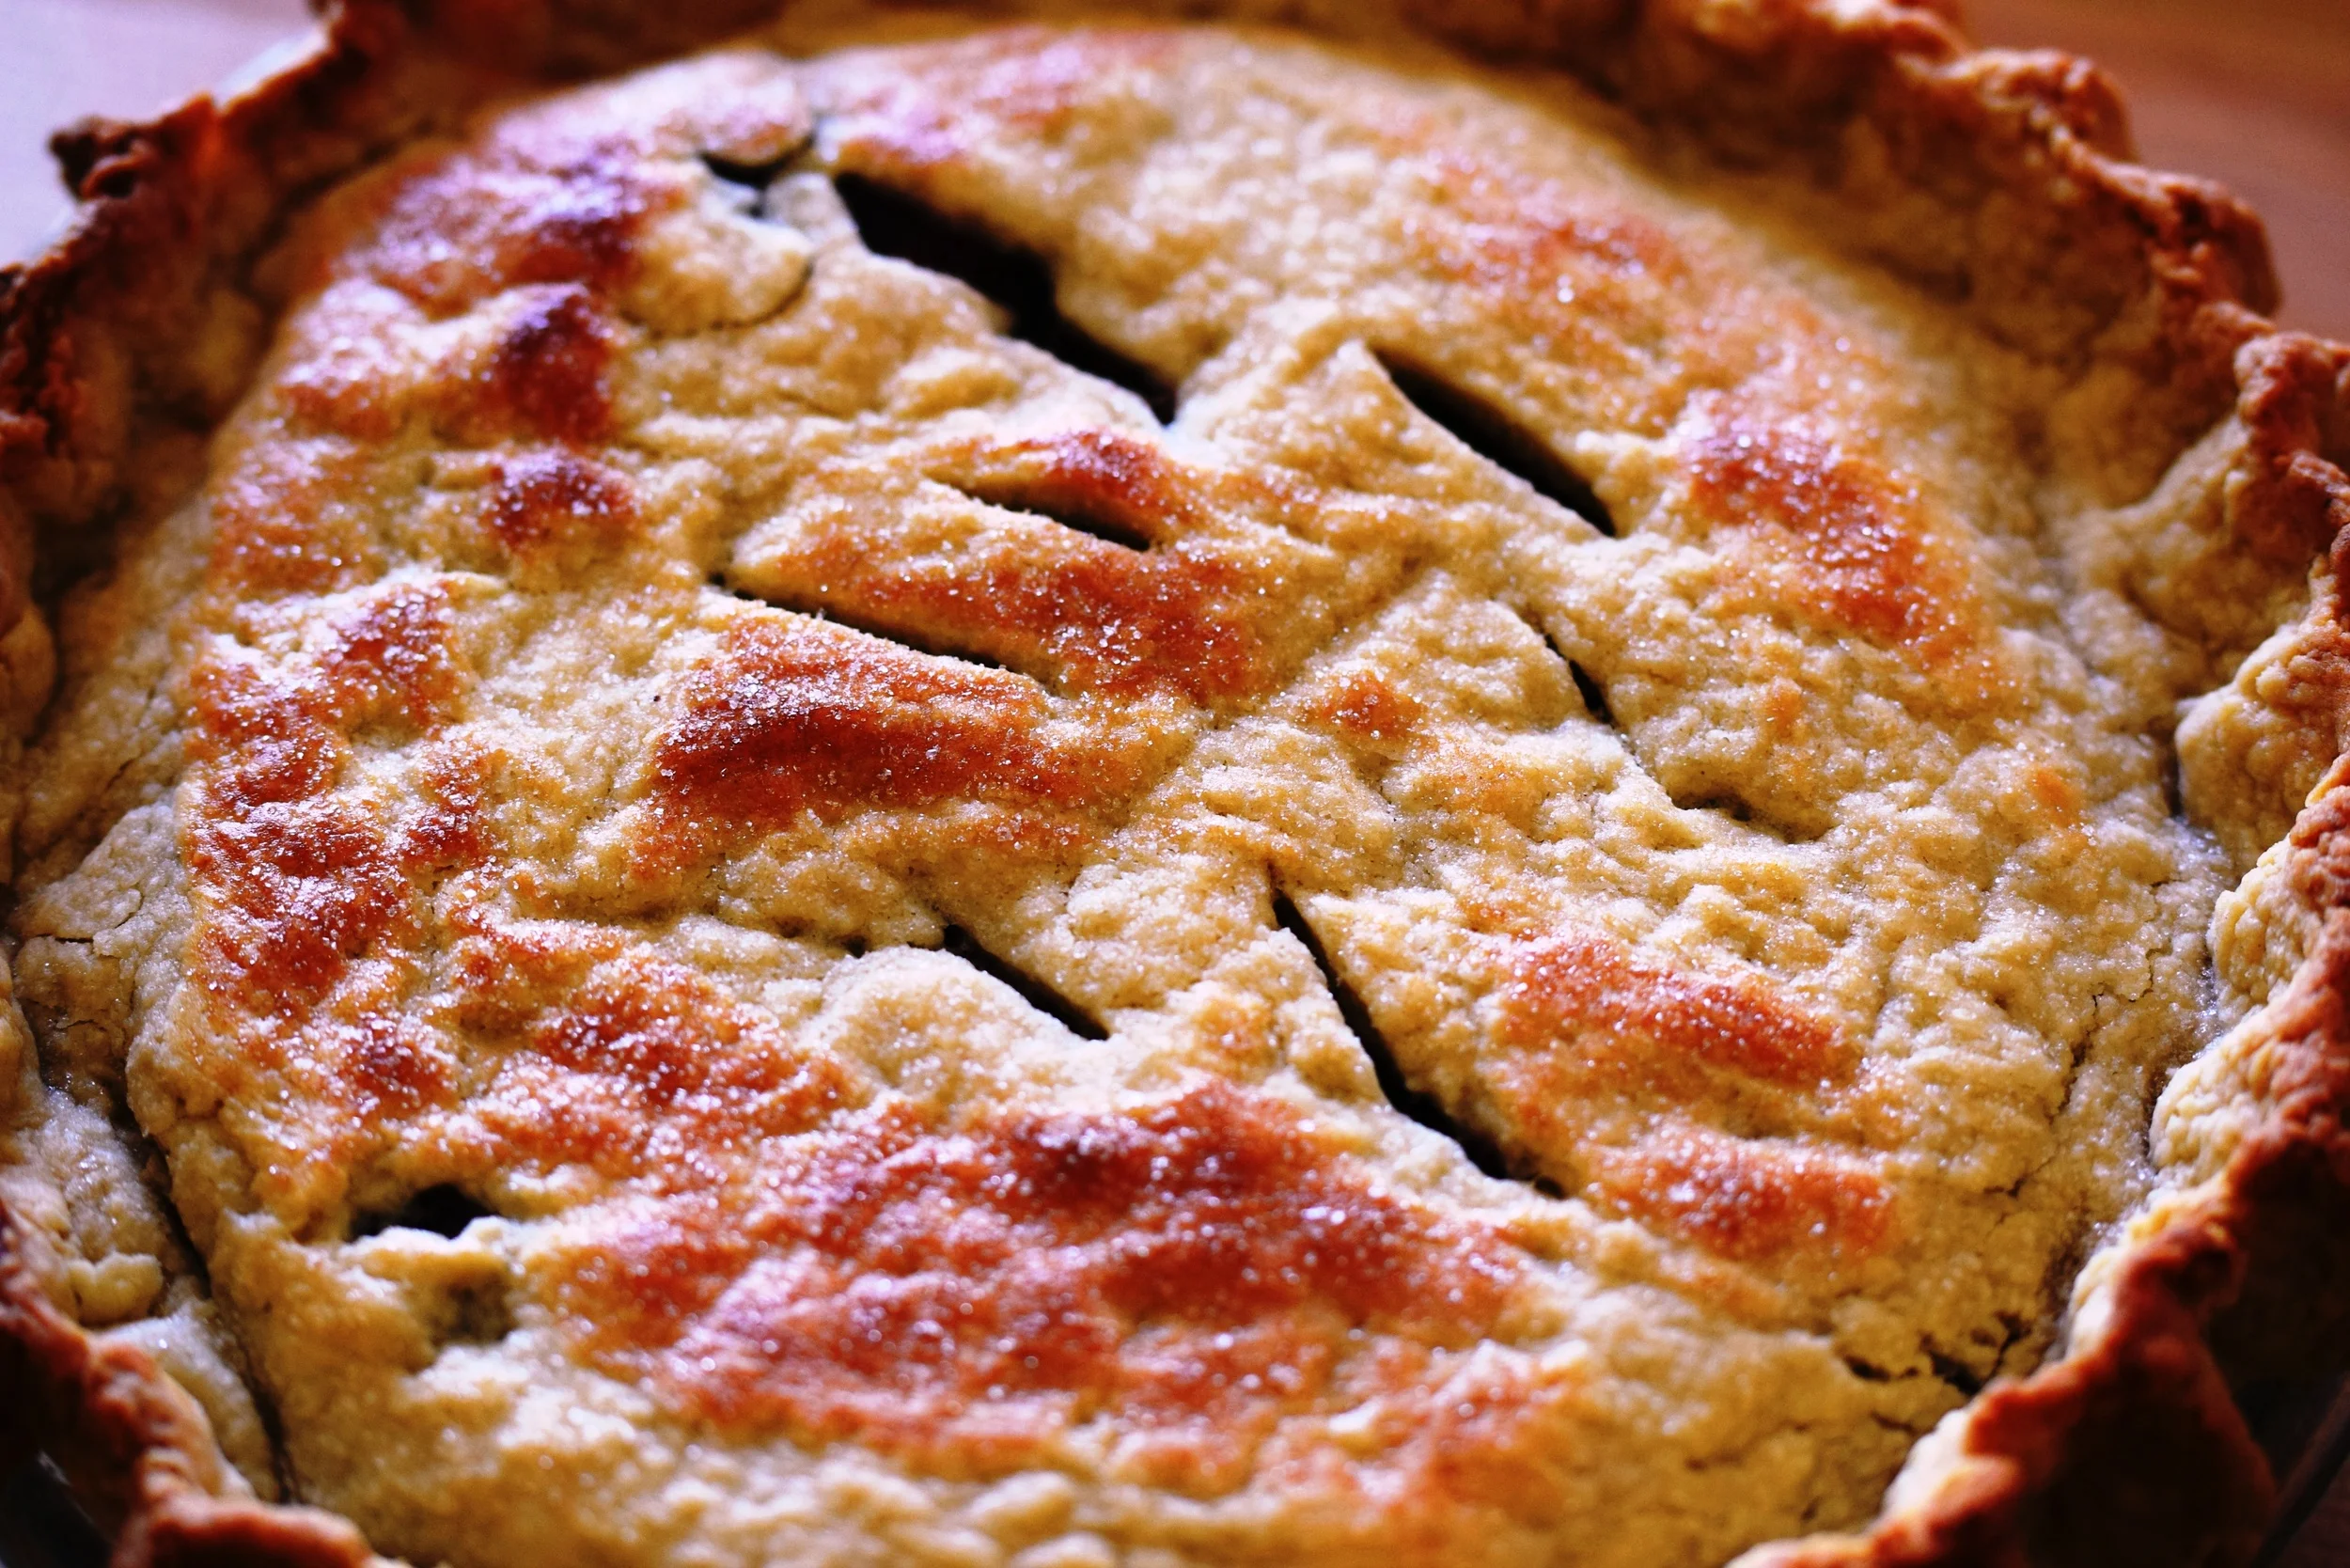
Basic Pie Crust

(Click on the photo above for a demonstration of making and rolling out pie dough!)

There are many pie crust recipes, and just as many opinions about what makes the best crust!  I grew up eating lard pie crust, and it is still my favorite.  But, there are quite a few folks that are lard-averse I have learned.  So I came up with this recipe using lard (if you care to) or shortening, as they both make a tender, flaky crust, and also butter, for rich flavor.  This is a basic, and pretty much no-fail recipe.  The dough is easy to work with, and yields a flavorful, flaky, golden brown crust. Surprise ingredients include vinegar and vodka!  Because vodka is primarily alcohol, it immediately evaporates when it hits the heat of the oven creating air pockets in the crust. I first discovered this trick in an issue of Cooking Illustrated and it definitely improves the lightness of the crust.
There are many factors that effect the finished crust. WEIGH the fat, it is the the most accurate way to measure, and no messy measuring cups! The amount of liquid needed will vary with the humidity and moisture content of the flour. For this reason I recommend using a pastry blender to mix the dough by hand if you're a beginner,  to get the "feel" of a properly mixed dough.  It takes a little experience to become adept at making pie crust, so practice! Once you're familiar with how a good pie dough feels, by all means use a food processor, being cautious not to over-process, resulting in a less flaky crust.  With a little practice you'll be an expert pie baker in no time!

2 1/2 cups all-purpose or unbleached flour

1 1/2 teaspoon salt

1 teaspoon sugar (omit for quiche or other savory dishes)

4 ounces cold shortening or lard, cut in pieces

4 ounces cold butter, diced

2 Tablespoons vodka, chilled (if you don't want to use Vodka, increase vinegar and water by 1 Tablespoon each)

1 Tablespoons cider vinegar, chilled

2-4 Tablespoons ice-cold water or milk

Make dough:

Combine flour, salt and sugar (if using) in a large bowl (or bowl of a food processor, if using). Add butter and lard or shortening and cut in with pastry blender until the fat is about the size of large peas.  (If using a food processor, the fat should be in large pieces, about one inch.)  Sprinkle the vodka, vinegar, and 2 Tablespoons of the water over the flour mixture.  Cut in and gently toss (or process) just until dough begins to come together; if dough still has a lot of dry flour, add more water, a Tablespoon at a time until dough comes together.  (Use care not to add too much liquid, or the crust will shrink and not be as flaky. The dough should not be wet or sticky.) Stop when the dough still looks a bit "shaggy". 

Lay out a large piece of plastic wrap on the counter and dump the dough out onto it.  Pull the corners of the plastic wrap up and use the wrap to form the dough into a ball.  Divide into two equal pieces (weigh each half) and wrap in plastic, using the plastic to form each half into a disc, about an inch thick.  Refrigerate for at least an hour before rolling out.

Roll out dough:

Flour a board or the counter top*.  Place a disc of dough on the flour and dust the top of the dough with flour.  Flour the rolling pin and roll the dough in one direction, turning a quarter turn after each roll, dusting the work surface with more flour as often as necessary to keep it from sticking.  The secret to keeping the dough from sticking is to keep it moving, and keeping the surface well-floured.  Roll to a 12-inch circle for a 9-inch pie plate. If it is not a perfect circle, don't worry!  Trim it before placing in the pie plate and use the scraps to repair any holes, tears or voids because there will inevitably be some of those!  Roll the dough around the rolling pin until all the dough is wrapped around it.  Unroll onto the pie plate (glass or ceramic is best!) and gently ease the dough into the pan.  Now is the time to use those scraps to repair anything that needs fixing!  Tuck excess dough under and press together firmly if making a single crust pie and crimp edge all the way around.  (See video for blind baking instructions.)

If making a double-crust pie roll out the second disk of dough, fill the pie, then repeat rolling the dough around the rolling pin.  Brush the rim of the bottom crust with a bit of water or milk and unroll dough over the filling.  Press the dough lightly to seal, the trim the dough (a 2-inch overhang is about right), if needed, and tuck under the top and bottom crust, and crimp.  Cut vents in the top of the pie to allow steam to escape. Brush the top with light cream or whole milk and sprinkle generously with sugar.  Bake according to recipe instructions.

*Alternately, dough can be rolled between large sheets of plastic wrap or parchment paper, eliminating the need for flour.  When the proper size and thickness is achieved, remove top sheet of wrap or paper, sprinkle with a bit of flour, roll around pin, then unroll into the pie plate and continue as above.

Feast of Eden's Figgy Piggy Panini

The Figgy Piggy Panini

The Figgy Piggy Panini

Figs are one-of-a-kind edibles and available for a very short time each year.  To make the most of fig season I try to get them into as many sweet & savory dishes as possible.  This is a fabulous panini; you will just have to try it, as words fail me!

For each sandwich:

2 slices sourdough bread

1 teaspoon Dijon mustard

2 slices Provolone or Muenster cheese

1 large, whole, fresh fig, sliced very thinly lengthwise

3 slices crisply cooked bacon

Melted butter, for brushing onto panini

Preheat a panini grill to High. (No panini grill?  Heat a cast iron skillet on medium-high and have another, smaller skillet on hand to press the sandwich.) 

Lay bread out on a cutting board or counter.  Spread one slice of bread very thinly with Dijon mustard, using as little as possible while creating an even layer.  Place a slice of cheese on the slice of bread with mustard. Place the fig slices on top of the cheese, then lay the bacon on top of the figs. Place second slice of cheese atop the bacon, then place the second slice of bread on top of all.  

Brush liberally with melted butter, making sure the surface is completely coated, on both sides.  Place sandwich on the grill and close carefully, making certain everything is laying flat on the grill. ( If using a skillet, place the sandwich in the pan and weigh down with a smaller skillet. When the bottom is a deep golden color, flip the sandwich, replace the skillet and continue cooking until it is well-browned.)  Cook until the sandwich is a deep golden brown and all of the cheese has melted.  Remove from the grill or skillet and allow to rest for a minute or so before serving.

P.S.  This makes a hearty, filling breakfast sandwich.  Make one & share half!

Best Key Lime Pie

Key Lime Pie is one of my absolute favorites!  And that is saying something, because pie is one of my favorite food groups!  I've tried lots of variations for Key Lime pie, but this is the best!  It has egg yolks, which add a richness and mellowness, and is baked briefly. Be sure to use either fresh key lime juice (they are in season in June & July), or buy bottled key lime juice with no additives; I am a purist in this respect!  Topped with whipped cream, you will swoon when you taste this pie!  I can't wait to hear your comments; please leave them below.  Ask any questions via the "Ask the Chef" form.  Enjoy!

Graham Cracker Crust:

  • 1 1/2 cups graham cracker crumbs
  • 1/3 cup granulated sugar
  • 6 Tablespoons (3 ounces) melted butter

Combine ingredients in a medium bowl and stir until well combined and holds together when squeezed together. 

Butter a 9-inch pie plate (preferably glass).  Dump crust mixture into pie plate. Press mixture evenly across the bottom and up the sides. (I use a 1/2 cup stainless measuring cup to smooth the bottom and press the sides firmly.)  Set aside

Preheat oven to 375-degrees.

Filling:

  • 1/2 cup freshly squeezed or bottled Key Lime juice
  • 4 egg yolks
  • 1 can sweetened condensed milk
  • 2 cups stiffly whipped cream
  • Zest from 1-2 Key limes

Place lime juice, egg yolks and sweetened condensed milk in a bowl and whisk together until completely smooth.  Pour into graham cracker crust and smooth.

Bake in preheated oven for 20 minutes.  Remove and cool to room temperature, then refrigerate until completely chilled, at least 3 hours.

Place whipped cream in a pastry bag and pipe over the top of the pie with a large tip. No pastry bag?  Drop tablespoons of cream over the pie and swirl with a spatula. Garnish with zest.

Flavorful Simple Syrups make Summer Drinks & Dishes Shine!

Iced teas and lemonades are summertime staples.  When it is hot and steamy outside there is nothing like an icy cold glass, sweating from melting cubes, filled with your favorite drink.  Flavor that tea or lemonade with raspberry, strawberry, lemon, lime, peach or mango, and you've taken that drink to a whole other level! 
Prepared flavored drinks can be pricey, and many times the consumer gets more than bargained for in terms of artificial flavoring, color and preservatives.  Follow the simple steps below, grab a few simple ingredients and make your own drink creations! These are the basic steps with some flavor suggestions, but once you get into it, you'll realize that simple syrups are pretty much limited only by your imagination.  I give instructions for lemon and berry syrups, but how about ginger (use fresh ginger slices), vanilla (a vanilla bean), mint, herbs, or dried peppers and spices?  Just remember to allow the flavoring agent to steep until the syrup has completely cooled, then strain. 
In the winter, flavored syrups are fabulous in coffee, and that takes us in another direction entirely (more to come later).  How about pouring some over a bowl of ice cream, sorbet, or fresh fruit?  What a perfect summer treat!  Experiment with the basic formula, and you'll never buy flavored tea or lemonade again!  (See the Lemon Simple Syrup recipe used in the Lemon & Black Pepper Strawberry Shortcake, too.)

The "normal" ratio for simple syrup is equal parts (by weight) sugar and water.  I've adjusted those amount to allow for the liquid contained in the berries.  I also like this syrup a bit more concentrated, so less is needed and the fruit flavor is more concentrated.  Adjust to suit your personal taste, as always!

12 ounces berries (strawberries, raspberries, blackberries, etc.) or other fruit (puree fruits like peaches and mangoes first)

12 ounces granulated sugar

6 ounces water

Juice of 1/2 lemon

Place berries in a medium saucepan and crush slightly. (No need to crush pureed fruits, obviously!)  Add sugar, water, and lemon juice.  Bring to a hard boil over high heat, then reduce heat and boil lightly for 10 minutes.  Remove from the heat and allow to cool to room temperature.  Strain through a fine mesh strainer.  Store in the refrigerator. 

Use the syrup to flavor tea or lemonade; you determine the amount that makes you happy!

Use your imagination to come up with your favorite flavors: mint, ginger, lime, basil, mango, peach, vanilla, the lists goes on.  Have fun and enjoy the "fruits" of your easy labors.

Please leave your comments below; I would love to hear about your flavored syrup adventures!

Crunchy Rhubarb Muffins

These rhubarb muffins have a tender crumb interior and crisp, sweet exterior 

These rhubarb muffins have a tender crumb interior and crisp, sweet exterior


Rhubarb fascinates me!  A glorious vegetable-fruit, it's long history and storied past provide many reasons to celebrate it each spring. Many memories of pulling the stalks out of the ground with a brother or two and nibbling it, seeing who could actually chew up and swallow some fill my mind each spring.  Of course we were taught not to eat the leaves (they are poisonous), which only added to the mysterious allure of the stuff for us!  We knew that the stalks would soon be transformed by our mother or a grandmother into something indescribably delicious.
This muffin recipe lets the rhubarb shine without any sour notes.  Originally published in Fine Cooking years ago, you will keep this recipe in your springtime file and find yourself making it many times when rhubarb is available!

(Check out the video of my visit to see Carol the "Rhubarb Queen" in the video section!)

Muffin batter:

2 cups all-purpose or unbleached flour

3/4 cup granulated sugar

2 1/2 teaspoons baking powder

1 teaspoon ground cinnamon

1/2 teaspoon baking soda

1/2 teaspoon kosher salt

1 cup sour cream

4 ounces (8 Tablespoons) unsalted butter, melted and cooled slightly

2 large eggs

1 teaspoon pure vanilla extract

1 1/2 cups 1/4-inch-diced rhubarb (about half a pound)

Topping

3 Tablespoons granulated sugar

1/2 teaspoon ground cinnamon


Preheat the oven to 400-degrees.  Line 12-cup muffin tin with paper liners.

In a large mixing bowl combine all of the dry ingredients for muffins (flour through salt) and whisk until well-blended.  Add the rhubarb and toss to combine.

In a medium bowl whisk together the sour cream, melted butter, eggs and vanilla until smooth.  Add to the bowl with the dry ingredients and rhubarb.  Using a rubber spatula, stir until just combined; do not overmix or muffins will be tough.

Using an ice cream scoop or large spoon, divide the dough evenly among the muffin cups.  Smooth and settle the batter with the back of a spoon or spatula, leaving it a little higher in the center.

Combine the topping ingredients and sprinkle over each muffin, about 3/4 teaspoon each.

Bake the muffins until they're golden brown and spring back when gently pressed, or when a toothpick inserted in the center comes out clean, 18-22 minutes.  Let them cool in the pan for 5 minutes, lift them out; you may need to loosen them with the tip of a knife.  Serve warm.

Breakfast Egg & Potato Bake

Breakfast Egg & Potato Bake

Breakfast Egg & Potato Bake

This is one of those dishes you'll make again and again, because it is easy, delicious and attractive.  Make it the night before, then bake it just before serving.  Add Sweet rolls or coffee cake, fresh fruit, and coffee for the perfect weekend or special occasion breakfast!  I made this dish for 80 people every quarter for the Membership Class Graduation at my church; and it always got rave reviews!

Serves 8


2 tablespoons vegetable oil

1  1/2  cups chopped onion

1 medium green bell peppers, chopped

1 medium red bell pepper, chopped

2 cups small ham cubes, or crumbled bacon, or crumbled sausage (Optional)

10 extra-large eggs

2 pounds frozen shredded hash browns, thawed

½ pound shredded Cheddar cheese

Combine oil, peppers, and onions, season lightly with salt and pepper.  Spread on a large baking sheet in a single layer and roast in a 425-degree until they become slightly tender and slightly browned.  Remove & set aside to cool.1Break eggs into a large bowl; beat until very well combined, season with salt and pepper (about 2 T. salt and 2 teaspoons black pepper).  Add the veggies, potatoes, and meat (if using), combine thoroughly. 


Spread in 1 greased 9 X 13-inchbaking dish.  Sprinkle cheese over the top.  Cover with foil lid and refrigerate overnight.

The next morning, remove pan from refrigerator, remove foil and allow to sit at room temperature while preheating the oven to 400-degrees. 

Bake for approximately 40-60 minutes, until puffed all over and browned on top.  (If the casserole browns too quickly, cover with foil until cooked through.) 

Lemon & Black Pepper Strawberry Shortcake

Strawberry Shortcake with a twist! The perfect recipe for the month of June, when strawberries are at their peak here in the Midwest.

This recipe came to me as I was meditating on how to create a better than “plain Jane” version of strawberry shortcake.  My love of the combination of lemon and black pepper inspired me!  I went straight to the kitchen to try this out, and sure enough, it was amazing, with samplers concurring!  The lemony shortcake livens up a usually bland element to this dessert, while the lemon-infused simple syrup lends flavor and extra juiciness to the berries.  Adding the black pepper gives it just a hint of warmth at the end.  So good!  Serves 6

Shortcake:

2 cups flour

¼ cup sugar

½ teaspoon salt

1 Tablespoon baking powder

2 teaspoons lemon zest

12 Tablespoons (1 ½ sticks) unsalted butter, cold, cut into cubes

2 cold large eggs

½ cup cold heavy cream

¼ teaspoon each vanilla and lemon extract

1 egg

1 Tablespoon half and half

Sugar, for sprinkling

Strawberry Mixture

2 pounds ripe strawberries

¾ cup sugar

½ cup water

2 Tablespoons freshly-squeezed lemon juice

1 teaspoon freshly-ground black pepper, medium grind

Topping

1 cup cold heavy cream

2 Tablespoons confectioner’s sugar


To make shortcake:

Preheat oven to 400-degrees

Combine flour, sugar, salt, baking powder and zest in a food processor and pulse to combine.  Add butter and pulse until mixture just starts to look crumbly.  (Don’t over-process, the small bits of butter make the shortcake tender!)

Transfer to a large bowl.  Beat eggs in a small bowl until no streaks remain, then beat in the cream and extracts.  Pour over the flour mixture and mix gently with a rubber spatula until the wet and dry ingredients just come together.  Dump out onto a floured board.  With floured hands, pat the dough into a rectangle, approximately 6 x 9-inches.  Cut into 6 equal square pieces.

Transfer to a parchment-lined baking sheet.  Beat together the remaining egg and half and half together until light and well-combined to create and “egg wash”.  With a pastry brush, brush over the tops of the shortcakes, and sprinkle generously with sugar to cover the tops.

Bake for 8 minutes, rotate baking sheet, then bake another 8-10 minutes, or until golden brown.  Remove from oven and transfer to a cooling rack.

Prepare strawberries:

Simple syrup: Combine sugar, water, and lemon juice in a medium saucepan.  Bring to a boil over high heat and boil for 30 seconds.  Remove from heat and cool completely.  Strain mixture into a small bowl and set aside while preparing strawberries.

Wash, dry and stem strawberries.  Cut into halves or quarters, depending on size of berries and place in a large mixing bowl.  Using a potato masher, smash the strawberries until half are well mashed and half are still intact.  Add enough of the simple syrup to thoroughly moisten all of the berries, 1/2 to ¾ cup.  Stir in black pepper.

Prepare whipped cream:

Place heavy cream and sugar in a chilled bowl.  Beat with mixer until firm peaks form.

Assemble:

Split shortcakes.  Place bottom half in serving dish.  Top with strawberries and a dollop of whipped cream.  Top with shortcake “lid” then more strawberries (and juice) and finish with a generous dollop of whipped cream.  Serve!

Tempting 'Tater Salad

Tempting 'Tater Salad

Tempting 'Tater Salad

This is my spin on a recipe I watched Tyler Florence prepare.  Literally more than a ton of this left the kitchen at Feast!  Mustard, garlic, green onions and redskin potatoes make this potato salad one to remember.  Great for all those summer cookouts!

3   pounds redskin potatoes

1   cup mayonnaise

2   Tablespoons Dijon mustard

2   Tablespoons grainy mustard

2    cloves garlic, finely minced

2   Tablespoons white wine vinegar

4   green onions, white and green parts, trimmed and sliced very thin

¼  cup finely chopped parsley

Kosher salt and freshly ground black pepper

Place potatoes in a pot, cover with water, add 1 Tablespoon salt and bring to a boil.  Cook until potatoes are fork tender.  Drain immediately and cool until they can be handles.  Cut into half-rounds or cubes approximately 1-inch thick.  Sprinkle generously with salt while hot and toss.

Make dressing by combining remaining ingredients until thoroughly combined.  Add salt and pepper to taste.  Combine the dressing and potatoes.  Taste and adjust seasoning, as needed. (Potatoes require a lot of seasoning!  Don’t skimp on the salt or the dish will taste flat.)

Greek Lentil Soup

Greek Lentil Soup

Greek Lentil Soup

The flavors of garlic, lemon and oregano make this soup a favorite! Red lentils, tomatoes and spinach makes for a colorful soup that beckons us to fill a bowl.  Because this soup is as healthy as it is delicious, you may want to fill it a second time!

1 1/2 cups red lentils, soaked in boiling water for 20 minutes and drained

3 T. olive oil

2 cups diced onion

1 tablespoon minced garlic

1 teaspoon dried oregano

1 bay leaf

1/4 cup lemon juice

6 cups vegetable broth

2 cups diced tomato

4 cups fresh spinach, chopped


Heat olive oil in a soup pot over medium-high heat.  Add the onion and saute until softened.  Add garlic and cook about 1 minute.  Add oregano and bay leaf, cook one minute more.  Add lemon juice and cook until juice is nearly evaporated.  Add broth and tomatoes, bring to a boil, reduce heat to low, cover and simmer 25 minutes.

Remove bay leaf.  Stir in lentils and simmer until they are tender, but not mushy.  Add the spinach and cook until wilted.  Season with salt and pepper to taste.  Serve.

Mustard & Herb Roasted Pork Tenderloin

Click to view a how-to video!

This was always a top choice by my catering customers, and with good reason.  Succulent, tender pork roasted slathered with a garlic, mustard and rosemary is roasted to perfection and was served with Cherry-Rhubarb Chutney on the side, or with a sauce made from the pan juices.  Both are phenomenal. There is nothing difficult about this either!  I always purchased a whole pork loin and trimmed it myself, but to save time purchase one that is already prepared, or ask your butcher to do it for you!  There will be leftovers to make Mark's Favorite Pork Tenderloin Sandwich, and maybe even enough for Hearty Summer Spinach Salad!  (Center portion serves 8)

1 whole boneless, center-cut pork loin, trimmed

 Mustard & Herb Rub

1/4 cup olive oil                           2 T. finely-minced garlic

1 Tablespoon Dijon mustard      2 teaspoons Kosher salt

1 Tablespoon finely-minced rosemary

1 teaspoon freshly-ground black pepper

1 teaspoon all-purpose seasoning (I use Trade East)

Preheat oven to 350-degrees.  Lightly grease the bottom of two heavy sheet pans or one large, shallow roasting pan. (If the sides of the pan are too high the meat will not brown nicely.)

The whole pork loin will be too long to fit on the baking sheet, so cut it in half, or take a piece off of each end, leaving the center piece intact.  (You can cut the end pieces into filets to grill or pan-roast, or cut into strips for stir-fry.  Roasting all of the loin will provide extra for other uses!)  Coat each piece of meat evenly with the Mustard & Herb Rub.  Place on baking pans and allow to stand for an hour.

(Before placing in the oven, I insert the probe of a programmable digital meat thermometer that allows me to place the probe in the meat and the thermometer has a magnet that I place on the oven door.  It sounds an alarm when the meat is done-a perfect way to insure perfect doneness. These are very inexpensive and available at most discount department stores.  If you do not have one, then use an instant read or regular meat thermometer.) 

Place meat in the preheated oven and roast to 130-degrees F.  (Check temperature after 35-40 minutes,  then every 15 minutes until temperature is reached.)  Remove from the oven and tent loosely with foil for 15 minutes and allow to rest before slicing and serving.  Enjoy!

Mark's Favorite Pork Tenderloin Sandwich

This sandwich is out of this world!  It was a favorite special and frequently requested.  This is a fabulous way to use left-over roasted pork tenderloin-it won't feel like leftovers at all!  The brioche bun is key, and Cherry-Rhubarb Chutney is what puts this sandwich head and shoulders above most!  Try it and you'll be hooked, for sure. Check out the video, too!

For each sandwich:

4 ounces Mustard & Herb Roasted Pork Loin, thinly sliced

1 Brioche bun

2-3 Tablespoons Cherry-Rhubarb Chutney

Red onion, thinly sliced

1 slice Muenster cheese

Small handful of spring greens

Spread Cherry-Rhubarb Chutney onto both sides of bun.  Place greens on the bottom bun, top with Muenster, then pork, finish with red onion.

Summer Spinach Salad with Pork Loin & Strawberries

Summer Spinach Salad with Pork Loin & Strawberries and Cherry-Rhubarb Dressing

Summer Spinach Salad with Pork Loin & Strawberries and Cherry-Rhubarb Dressing

This salad is perfect for an early summer lunch!  The recipe came about as a way to use left-over Mustard & Herb Roasted Pork Tenderloin. The Cherry-Rhubarb Chutney that accompanies the pork loin is the base of the salad dressing served with it.  Cooking once and eating 2 or 3 times makes me a happy girl!

Cherry-Rhubarb Salad Dressing

1/4 cup Cherry-Rhubarb Chutney

1/4 cup balsamic vinegar

2 Tablespoons water

1 Tablespoon lemon juice

1/2 cup olive oil

1/2 cup extra-virgin olive oil

Generous pinch each of salt & black pepper

1 Tablespoon fresh chives, very thinly sliced

Combine all ingredients, except chives, in the container of a blender and blend until smooth.  Pour into bowl and stir in chives.


Spinach Salad

Per serving:

2-3 cups fresh spinach, washed, dried and chilled

8 half slices of English cucumber

1-2 very thin half-moon slices of red onion, separated

2 ounces roasted pork tenderloin, cut into strips

4 large strawberries, stemmed and cut into quarters

1 Tablespoon crumbled Blue Cheese (substitute Feta or Goat Cheese if you're not a Blue Cheese fan!)

2 Tablespoons toasted, slivered almonds

Layer all ingredients on a plate.  Serve dressing on the side.

Cherry-Rhubarb Chutney

Cherry-Rhubarb Chutney

Cherry-Rhubarb Chutney

This sweet-tart concoction has an amazing color and adds a bright, tangy note to whatever it is served with.  The perfect complement to roasted or grilled pork, it also serves as the sandwich spread on Mark's Favorite Pork Tenderloin Sandwich.  It makes a great base for a salad dressing for theSummer Spinach Salad with Pork Loin & Strawberries, too!  This keeps for several weeks in the 'fridge-if it lasts that long. When you can't get rhubarb, substitute fresh cranberries! If I have both cranberries and rhubarb, I use them both. (This is my adaptation of a recipe I discovered in Fine Cooking several years ago.)

2 cup medium-diced rhubarb

1 cup small-diced onion

1/2 cup coarsely chopped dried cherries

1/2 cup sugar

1/2 cup sherry vinegar

3 Tablespoons honey

1 teaspoon finely grated lemon zest

1/2 teaspoon kosher salt

Combine all the ingredients in a small saucepan.  Bring to a boil over medium-high heat, cover, and simmer over medium to medium-low heat until the onions are translucent and the juices are beginning to thicken, about 5-6 minutes.  Uncover and simmer, stirring frequently, until very thick, 8-10 minutes or more.  Let cool completely in the pan before using or storing in an airtight container.

Yields about 1 3/4 cup