A few of my favorite egg hacks!

I was making tuna salad today, and it occurred to me that I hadn't shared a few of my favorite egg hacks with you!  These hacks came about out of necessity, as we made tuna salad daily at the cafe, as well as egg salad and other special salads that contained eggs.  Peeling and chopping the eggs for those salads was messy and time-consuming, and as the years passed, I came up with some shortcuts that made this work easier, faster, and less messy.

First and foremost the eggs need to be cooked and cooled enough to handle.  Here is my simple formula for perfect hard boiled eggs:

Place the eggs in a generously sized pot (don't over-crowd the eggs) and cover them with water, with at least one inch over the tops of the eggs.  Set the pot over high heat and bring to a boil.  Boil for one minute.  Remove from the heat and cover.  The eggs bathe in the hot water for:             

  • Small eggs-9 minutes                              
  • Medium eggs-10 minutes
  • Large eggs-11 minutes                             
  • X-Large-12 minutes
  • Jumbo eggs-13 minutes

While the eggs finish cooking, prepare an ice bath in a bowl large enough to accommodate the eggs, water to cover, and plenty of ice.  Remove the eggs immediately when the cooking time is up (set a timer!). Using a spider or slotted spoon, remove the eggs from the pot and place in the ice bath.  Let the eggs cool.

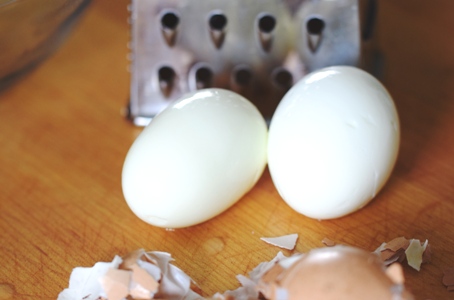
To peel, remove the eggs from the water, tap both ends on the counter to crack the shell, then roll the egg on the counter to break up the shell.  Dip the egg back into the water, allow the water to flow between the shell and the egg, making your job easier!  Peel the egg, dipping into the water as needed to slip off the shell.  Place the peeled eggs on a kitchen or paper towel to drain.

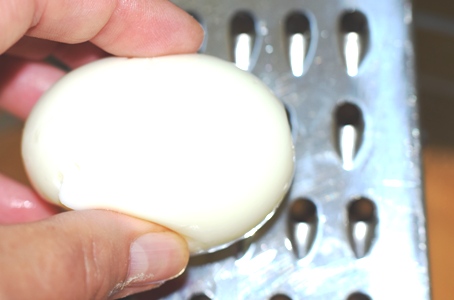
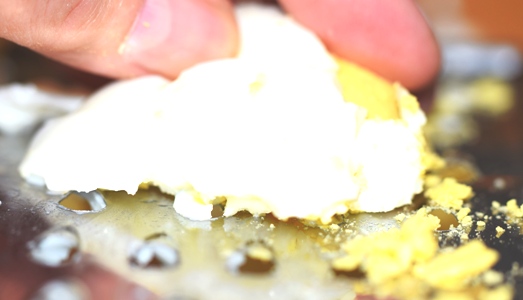
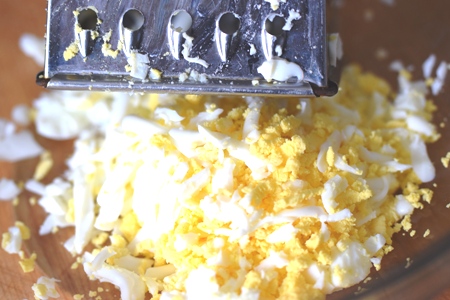
One day while preparing egg salad at the cafe, I looked at my food processor that I had just used to grate cheese and thought that just might be a great way to prep the eggs!  I tried it, and oh boy, did it ever work.  It's easy to use a hand grater for just a few eggs.  I find that the eggs combine so much better with other ingredients, and never again do pieces of egg fall out of a sandwich while being eaten!  Egg salad prepared this way is easy to spread, but not totally smooth, which I like.  When added to other mixtures the eggs blend in beautifully.  And it is so much faster!   

So next time you want to whip up a dish with chopped hard boiled eggs, give this method a try.  I think you'll love it!

USDA Guide to Seasonal Produce in the United States

End of Season Harvest.JPG

Seasonal cooking is not a new trend, it has been a necessity since the beginning of time!  I have been thinking lately about what it would have been like 200 years ago to have to cook and "put up" food here in the Midwest without electricity, refrigeration, or supermarkets.  I started thinking about how fortunate we are now; a lemon, lime, or avocado would never have been a part of our diets then.  I continued to ponder what I would cook seasonally with only products that could be grown in the Midwest.  The conclusion I came to is that I should be filled with gratitude every day for modern kitchens, conveniences, and sources of endless varieties of foods.  I do believe our ancestors would view all that we have now as culinary heaven!  (Be forewarned, my curiosity is far from sated on this topic, as I continue to think about a "Midwest-only" seasonally-driven menu, and what it would look like.)

Though we are able to purchase just about anything year-round at a supermarket, in-season, locally sourced food is always best.  I use the USDA's guide to seasonal produce (for the entire US), to help me remember what will be in season, and when, to plan seasonal menus and recipes.  It occurred to me that it would be a good resource to share!  It is useful for jogging the memory and to be reminded of the less-used produce we tend to forget about. 

Below is a link to this most useful guide. Each fruit or vegetable has a clickable link for more detailed information.  I hope you'll take advantage of this handy guide, and cook seasonally!

USDA Seasonal Produce Guide

Creating a Great Environment for Yeast Dough to Rise

Beautifully risen yeast dough

Beautifully risen yeast dough

I have tried many ways to coax yeast dough to rise beautifully in the least amount of time.  One trick was to put the bowl of dough in the microwave after heating a cup of water, leaving the cup in the corner of the microwave.  Maybe if the bowl is small (mine never is!) and you don't need to use that appliance for an hour or two.  Nix that one.  I've heated the oven for a bit, then turned it off.  That works, but on one occasion the oven and rack got a little too hot and killed the yeast, and at other times the oven cooled down before the dough was completely risen.  I keep my house cool, so just leaving it on the counter means a long rise time.  What to do?

While baking bread that required steam to create a crisp crust (No-Knead Country White Bread) I placed a skillet in the oven and added boiling water to create the steam effect.  Of course, the oven was hot in order to bake the bread, but it dawned on me that I could introduce gentle heat to the oven with boiling water to create gentle warmth for a yeast dough to rise in, just like in professional dough proofers. (Why that never occurred to me before escapes me. Seriously?!) 

So, after mixing up the next batch of dough, I placed a skillet in the bottom of the oven and filled it up half-way with boiling water.  In went the covered dough on the rack above, right over the skillet, and the timer was set for an hour.  And, it worked great!  The oven stayed warm and humid for the hour, and the dough obviously loved its environment, rising beautifully.  It also works well for the second rise, after the bread or rolls are shaped.  Finally, a method that worked without too much extra effort!  This is now my go-to technique.

Try this trick the next time you're baking bread, rolls, or making pizza dough.  I think you're going to love it!

Salad spinners-not just for lettuce!

Herbs & spinach clean, dry and ready to make pesto!

Herbs & spinach clean, dry and ready to make pesto!

There are a few tools that I consider indispensable in the kitchen, and a salad spinner is definitely one of them!  It is, of course, the best way to quickly dry lettuce and salad greens for serving or storage; a cardinal rule of green salad preparation is the greens must be cold and dry, and storing greens and lettuces that are wet will cause them to quickly deteriorate. But my trusty salad spinner (this one holds about one gallon of product, a miniature compared to the 5-gallon version that was used at the cafe!) does so much more.  Here are a few new ways to utilize your salad spinner.

Clean and dry mushrooms.  Some mushroom are so dirty that a wipe with a paper towel or brush is simply not enough.  A problem, because mushrooms absorb liquid, making washing them a challenge.  My solution?  Cover the bottom of the spinner's basket with mushrooms, then spray them with water, shaking the basket to get to all sides of the mushrooms, until the dirt is removed.  Place the basket in the spinner and spin until the excess water is removed.  Repeat as needed until all of the mushrooms are clean and dry.  Clean the mushrooms right before using, and do not clean more than will be needed. 

Remove moisture from shredded potatoes.  Latkes and hash browns are family favorites, and frozen shredded potatoes just can't compare to those "made from scratch", which means shredding and removing the liquid before preparing.  I had always used towels to squeeze the potatoes dry after shredding, which is messy, to say the least.  One day I spied my salad spinner on the counter as I was shredding some potatoes and wondered how it would work to spin them instead of squeeze them.  It works!  And, if you want to save the potato water for anything, it is waiting in the spinner.  Who knew?

Herbs for storing.  One of the best practices to keep herbs fresh and dry in the refrigerator is to wash and spin them dry as soon as you get them home from the market.  Trim the stems if you like after removing them from their container, then place them in the salad spinner.  Fill the spinner with cold water to cover by a few inches, and swish and wash them (add produce cleaner to the water if you use it.).  Lift the basket with the herbs from the spinner and empty out the water.  Return the herbs to the spinner and spin until dry.  (I rearrange the herbs once or twice between spins for maximum moisture removal.) Next, I lay out a length of paper towels (about 4 sheets) to spread the herbs out on.  After I spread the herbs evenly over the towels, I place a second length of paper towels over the top of the herbs and then roll up the herbs and paper towels loosely and place in a one-gallon plastic storage or freezer bag.  This works for parsley, cilantro, and similar herbs.  Basil is one herb that should be prepped right before using, without spinning, or it will turn black.  Having herbs clean, dry, and ready to use in the 'fridge is a real time saver!

Seeding tomatoes.  Seeding a few tomatoes is no big deal, but if several pounds are needed, a shortcut is most welcome!  Core, peel (if desired), and dice tomatoes then place them in the spinner and spin until the seeds are freed and removed.  Great when making salsa!

As you can see, a salad spinner is a must have! Check out the link below to purchase one if you don't have one in your kitchen.  It will be indispensable!